
Reeling in Redfish-Enabled Infrastructure using Curl
Author: Brandon B. Jozsa
Ever since I heard about DMTF's specification for Redfish, I was really excited to use it in the real world. The Redfish spec has been available for a while too. But what you'll find in the read world in terms of implementation is a bit interest. I'll cover three different implementations of this specification in today's article.
Table of Contents- Part I: Introduction
- Part II: Exploring the Redfish API
- Part III: Redfish in Practice
- Prerequisites
- Media Controls
- Attaching Virtual Media
- Booting Virtual Media
- Power Controls
- Powering Off the System
- Powering On the System
- Part IV: Variations Among Vendors
- Dell
- Supermicro
- Sushy-Emulator
- Part V: Conclusion
Part I: Introduction
If you've landed here from my previous article Sushy-Emulator: Redfish for the Virtualization Nation, then you've probably set up the sushy-tools and are looking for some real-world examples on how to use it. Using curl can be very useful for developers writing operations around Redfish, but it can also help administrators with direct server operations as well. I'll try to cover some different implementations of Redfish from vendors such as Dell, Supermicro, and from sushy-tools as well.
Part II: Exploring the Redfish API
For the following examples, I will be referring back to the configuration I provided in my previous article. As part of this deployment, the sushy-emulator was configured to listen on port 8000 on IP address 0.0.0.0 (all interfaces). Let's curl the host:port, where the host IP address is 192.168.3.99. As with my other examples, I'll use variables so you can easily update these for your environment:
REDFISH_HOST="192.168.3.99"
REDFISH_PORT="8000"

curl -s http://$REDFISH_HOST:$REDFISH_PORT/redfish/v1/ | jq -r
Example output:
{
  "@odata.type": "#ServiceRoot.v1_0_2.ServiceRoot",
  "Id": "RedvirtService",
  "Name": "Redvirt Service",
  "RedfishVersion": "1.0.2",
  "UUID": "85775665-c110-4b85-8989-e6162170b3ec",
  "Systems": {
    "@odata.id": "/redfish/v1/Systems"
  },
  "Managers": {
    "@odata.id": "/redfish/v1/Managers"
  },
  "Registries": {
    "@odata.id": "/redfish/v1/Registries"
  },
  "@odata.id": "/redfish/v1/",
  "@Redfish.Copyright": "Copyright 2014-2016 Distributed Management Task Force, Inc. (DMTF). For the full DMTF copyright policy, see http://www.dmtf.org/about/policies/copyright."
}
So you can see from the example above, there are various directories that we can review as part of the Redfish specification:
- Systems (managed system): System that provides information, status, or control via a Redfish-defined interface.
- Managers: A manager is a systems management entity that can implement or provide access to a Redfish service.
- Registries: Redfish registries includes message registries used for Redfish-defined messages, including events, and privilege maps.
(source: https://redfish.dmtf.org/)
So let's have a look at the following:
REDFISH_HOST="192.168.3.99"
REDFISH_PORT="8000"

curl -s http://$REDFISH_HOST:$REDFISH_PORT/redfish/v1/Systems/ | jq -r
Using my previous article as an example, where sushy-tools is managing several guest systems via the SUSHY_EMULATOR_LIBVIRT_URI definition at qemu:///system, the output would look something like this for "/redfish/v1/Systems":
{
  "@odata.type": "#ComputerSystemCollection.ComputerSystemCollection",
  "Name": "Computer System Collection",
  "Members@odata.count": 2,
  "Members": [
    {
      "@odata.id": "/redfish/v1/Systems/928c9a76-ae0e-4c8b-9505-3c2155a3eb3f"
    },
    {
      "@odata.id": "/redfish/v1/Systems/71cb2e89-0fcf-43b3-a0d2-a91f594a7fde"
    }
  ],
  "@odata.context": "/redfish/v1/$metadata#ComputerSystemCollection.ComputerSystemCollection",
  "@odata.id": "/redfish/v1/Systems",
  "@Redfish.Copyright": "Copyright 2014-2016 Distributed Management Task Force, Inc. (DMTF). For the full DMTF copyright policy, see http://www.dmtf.org/about/policies/copyright."
}
There are two systems that can be managed in this case:
928c9a76-ae0e-4c8b-9505-3c2155a3eb3f71cb2e89-0fcf-43b3-a0d2-a91f594a7fde
Let's continue digging into one of these systems (71cb2e89-0fcf-43b3-a0d2-a91f594a7fde), and add a little jq magic. We're going to add another variable for the REDFISH_SYSTEM to our previous variables earlier, but let's find out the overall health and system details using this command below:
REDFISH_HOST="192.168.3.99"
REDFISH_PORT="8000"
REDFISH_SYSTEM="71cb2e89-0fcf-43b3-a0d2-a91f594a7fde"

curl -s http://$REDFISH_HOST:$REDFISH_PORT/redfish/v1/Systems/$REDFISH_SYSTEM/ | jq '[{hostname: .Name, manufacturer: .Manufacturer}, {"hardware": {cpu: .ProcessorSummary.Count, memory: .MemorySummary.TotalSystemMemoryGiB}}, {"health": {system: .Status.Health, cpu: .ProcessorSummary.Status.Health, memory: .MemorySummary.Status.Health}}]'
The result should look like the following:
[
  {
    "hostname": "tuna",
    "manufacturer": "Sushy Emulator"
  },
  {
    "hardware": {
      "cpu": 16,
      "memory": 32
    }
  },
  {
    "health": {
      "system": "OK",
      "cpu": "OK",
      "memory": "OK"
    }
  }
]
Pretty neat, right? Ok, so let's cover how to load and boot virtual media using the Redfish API, along with rebooting systems so we can remotely install operating systems (Fedora 34) completely through the use of curl commands!
Part III: Redfish in Practice
This section will cover a series of useful commands, as well as give you an overview of how you can explore the API to determine the what's needed to manage a common Redfish-enabled system.
Prerequisites
Please consider the following prerequisites as we continue:
- Web Server for Hosting Virtual Media (here is a link to one such option)
Media Controls
First let's cover media controls, such as loading/booting of virtual media. This will take advantage of the link above (prerequisites). In general, any web server would work, which includes original download URLs - although your milage may vary.
Attaching Virtual Media
First, let's set a level playing field with the following variables. Change these to your manager/environment settings. We'll use these throughout the rest of this demonstration.
IMPORTANT: We are using the REDFISH_MANAGER variable, and NOT the REDFISH_SYSTEM variable this time. This will usually be the same, but be very aware of this difference when copy/pasting commands from below.
REDFISH_HOST="192.168.3.99"
REDFISH_PORT="8000"
REDFISH_SYSTEM="928c9a76-ae0e-4c8b-9505-3c2155a3eb3f"
REDFISH_MANAGER="928c9a76-ae0e-4c8b-9505-3c2155a3eb3f"
ISO_URL="http://192.168.1.35/iso/Fedora-Server-dvd-x86_64-34-1.2.iso"
First, let's determine if virtual media is already attached with this request:
curl -s http://$REDFISH_HOST:$REDFISH_PORT/redfish/v1/Managers/$REDFISH_MANAGER/VirtualMedia/Cd/ | jq '[{iso_connected: .Inserted}]'Example: If it is disconnected, it will report the following.
[
  {
    "iso_connected": false
  }
]
So let's attach the virtual media with the following curl POST:
curl -d \
    '{"Image":"'"$ISO_URL"'", "Inserted": true}' \
     -H "Content-Type: application/json" \
     -X POST \
     http://$REDFISH_HOST:$REDFISH_PORT/redfish/v1/Managers/$REDFISH_MANAGER/VirtualMedia/Cd/Actions/VirtualMedia.InsertMedia
Example: Using the example we provided before, the output should be different this time.
[
  {
    "iso_connected": true
  }
]
Booting Virtual Media
Now that you know how to attach virtual media to the Redfish-enabled system, let's change the boot order for the system. But first, let's verify the current order with the following (note, we're issuing the curl GET against the REDFISH_SYSTEM).
curl -s "http://$REDFISH_HOST:$REDFISH_PORT/redfish/v1/Systems/$REDFISH_SYSTEM" | jq .BootExample: Below is an example of my system.
{
  "BootSourceOverrideEnabled": "Continuous",
  "BootSourceOverrideTarget": "Hdd",
  "BootSourceOverrideTarget@Redfish.AllowableValues": [
    "Pxe",
    "Cd",
    "Hdd"
  ]
}
So now let's change the BootSourceOverrideTarget to leverage the virtual media URL provided above. If you followed my previous article entitled "Sushy-Emulator: Redfish for the Virtualization Nation" you will need to change the following:
SUSHY_EMULATOR_IGNORE_BOOT_DEVICE = True
to the following:SUSHY_EMULATOR_IGNORE_BOOT_DEVICE = False
This is because of the following pull request. Once this change is complete (and you've restarted the service (sudo systemctl restart sushy-emulator.service) then use the following PATCH command:
curl -X PATCH -H 'Content-Type: application/json' \
    -d '{
      "Boot": {
          "BootSourceOverrideTarget": "Cd",
          "BootSourceOverrideEnabled": "Continuous"
      }
    }' \
  "http://$REDFISH_HOST:$REDFISH_PORT/redfish/v1/Systems/$REDFISH_SYSTEM" \ | jq .
Now verify the changes have been applied successfully:
curl -s "http://$REDFISH_HOST:$REDFISH_PORT/redfish/v1/Systems/$REDFISH_SYSTEM" | jq .BootExample: it should look like the following.
{
  "BootSourceOverrideEnabled": "Continuous",
  "BootSourceOverrideTarget": "Cd",
  "BootSourceOverrideTarget@Redfish.AllowableValues": [
    "Pxe",
    "Cd",
    "Hdd"
  ],
  "BootSourceOverrideMode": "UEFI",
  "UefiTargetBootSourceOverride": "/0x31/0x33/0x01/0x01"
}
Power Controls
After the virtual media has been loaded and the boot order has been changed, it is time to reboot the system and install your OS. Below are some examples of how to achieve this with Redfish-enabled systems via curl.
Powering Off the System
Let's use the same set of variables we've been using throughout this article.
REDFISH_HOST="192.168.3.99"
REDFISH_PORT="8000"
REDFISH_SYSTEM="928c9a76-ae0e-4c8b-9505-3c2155a3eb3f"
REDFISH_MANAGER="928c9a76-ae0e-4c8b-9505-3c2155a3eb3f"
ISO_URL="http://192.168.1.35/iso/Fedora-Server-dvd-x86_64-34-1.2.iso"
With these in place, let's force the system into an "Off" state.
curl -s -d '{"ResetType":"ForceOff"}'  \
    -H "Content-Type: application/json" -X POST  \
    http://$REDFISH_HOST:$REDFISH_PORT/redfish/v1/Systems/$REDFISH_SYSTEM/Actions/ComputerSystem.Reset
Powering On the System
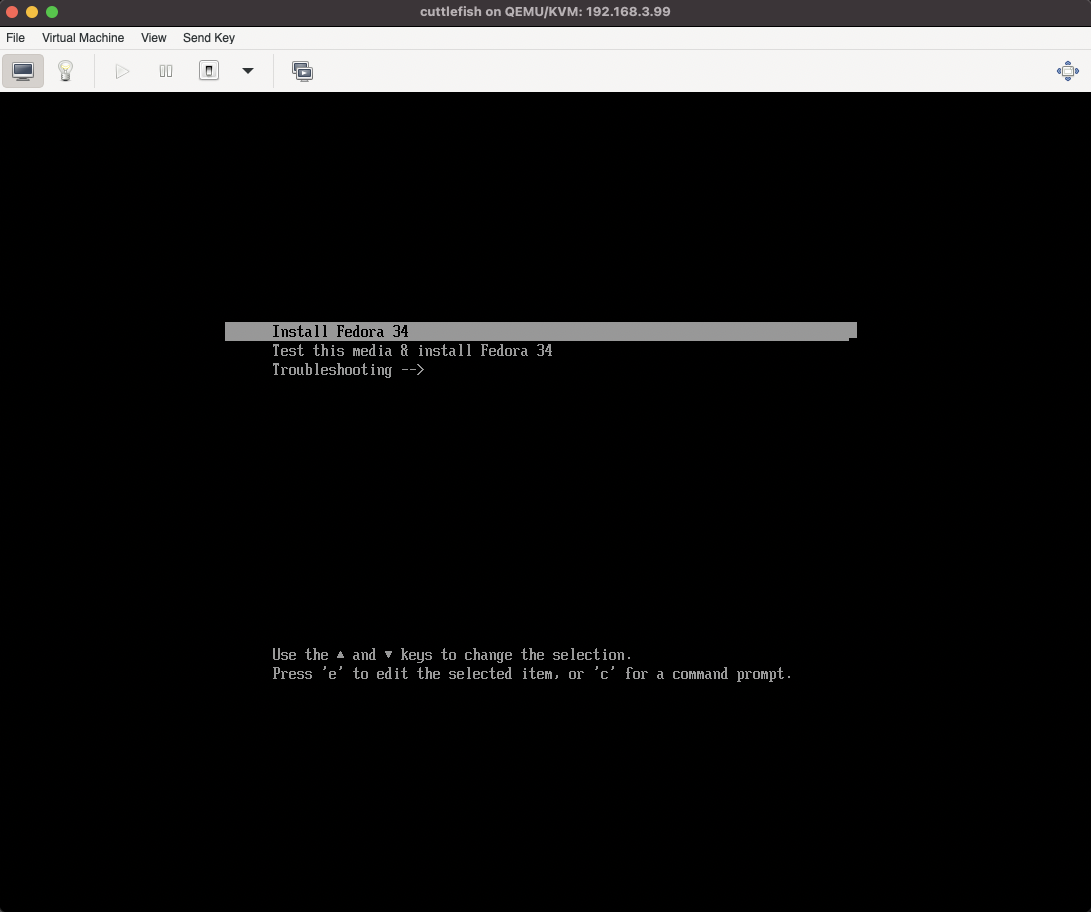
Next, with our Cd in the first boot order, let's force the system into an "On" state with the following curl command.
curl -s -d '{"ResetType":"ForceOn"}' \
    -H "Content-Type: application/json" -X POST \
    http://$REDFISH_HOST:$REDFISH_PORT/redfish/v1/Systems/$REDFISH_SYSTEM/Actions/ComputerSystem.Reset
And I'm happy to report that this looks like everything was pretty much a success, as you can see from the picture below!
Part IV: Variations Among Vendors
Now, if you haven't used Redfish to manage your infrastructure for vendors such as Dell, HP, or Supermicro, then you'll be in for a treat when trying to use something as simple as curl against each vendor's system. This is because each vendor has slightly different variations and implementations of the API in real world scenarios. Let me cover a few high level differences - which should be enough to give some room to experiment for yourself.
Dell
Dell has an interesting implementation whereas Systems are mapped to System.Embedded.1 and Managers are mapped to iDRAC.Embedded.1. To illustrate this, let's use similar variables to what we used earlier. Since this is an enterprise system with authentication, we will add some username/password information as well. Make sure to include your own values.
REDFISH_HOST="192.168.3.9"
REDFISH_USER='root'
REDFISH_PASS='calvin'
REDFISH_SYSTEM="System.Embedded.1"
REDFISH_MANAGER="iDRAC.Embedded.1"
Now you can use the same curl command that we used previously, where we remapped the key/values with usable CPU, Memory, and Health information.
curl -s -k -u ''"$REDFISH_USER"'':''"$REDFISH_PASS"'' https://$REDFISH_HOST/redfish/v1/Systems/$REDFISH_SYSTEM/ | jq '[{hostname: .Name, manufacturer: .Manufacturer}, {"hardware": {cpu: .ProcessorSummary.Count, memory: .MemorySummary.TotalSystemMemoryGiB}}, {"health": {system: .Status.Health, cpu: .ProcessorSummary.Status.Health, memory: .MemorySummary.Status.Health}}]'And this provides us with common output, like we had earlier with our sushy-emulator service.
[
  {
    "hostname": "System",
    "manufacturer": "Dell Inc."
  },
  {
    "hardware": {
      "cpu": 2,
      "memory": 256
    }
  },
  {
    "health": {
      "system": "OK",
      "cpu": "OK",
      "memory": "OK"
    }
  }
]
More Information:
If you want more information about Dell's Redfish implementation, please have a look at Dell's Redfish documentation.
Supermicro
Like Dell, Supermicro also does things a little differently (especially when it comes to virtual media). Supermicro makes things a little more straight-forward than Dell, as the both Systems and Managers map to 1.
I will give you some examples of an E300-9D-8CN8TP unit, which I use for OpenShift testing. Again, using the same variables (you know what to do by now).
REDFISH_HOST="192.168.3.9"
REDFISH_USER='admin'
REDFISH_PASS='admin'
REDFISH_SYSTEM="1"
REDFISH_MANAGER="1"
Same as before, we will issue the same command as with the Dell example.
curl -s -k -u ''"$REDFISH_USER"'':''"$REDFISH_PASS"'' https://$REDFISH_HOST/redfish/v1/Systems/$REDFISH_SYSTEM/ | jq '[{hostname: .Name, manufacturer: .Manufacturer}, {"hardware": {cpu: .ProcessorSummary.Count, memory: .MemorySummary.TotalSystemMemoryGiB}}, {"health": {system: .Status.Health, cpu: .ProcessorSummary.Status.Health, memory: .MemorySummary.Status.Health}}]'And the results are very similar.
[
  {
    "hostname": "System",
    "manufacturer": "Supermicro"
  },
  {
    "hardware": {
      "cpu": 1,
      "memory": 64
    }
  },
  {
    "health": {
      "system": "OK",
      "cpu": "OK",
      "memory": "OK"
    }
  }
]
Now where things start to drift a little is with virtual media management (at least with the E300-9D-8CN8TP units. An example of this is illustrated below, where the VirtualMedia is represented by VM1, vs how others represent it as /VirtualMedia/Cd/.
curl -s -k -u ''"$REDFISH_USER"'':''"$REDFISH_PASS"'' https://$REDFISH_HOST/redfish/v1/Managers/$REDFISH_MANAGER/VM1/ | jq .Example output: This produces the following results.
{
  "@odata.context": "/redfish/v1/$metadata#VirtualMediaCollection.VirtualMediaCollection",
  "@odata.type": "#VirtualMediaCollection.VirtualMediaCollection",
  "@odata.id": "/redfish/v1/Managers/1/VM1",
  "Name": "Virtual Media Collection",
  "Description": "Collection of Virtual Media for this System",
  "Members@odata.count": 0,
  "Oem": {
    "Supermicro": {
      "@odata.type": "#SmcVirtualMediaExtensions.v1_0_0.VirtualMediaCollection",
      "VirtualMediaConfig": {
        "@odata.id": "/redfish/v1/Managers/1/VM1/CfgCD"
      }
    }
  }
}
That's really all that I have time to cover, but you can start to see how each vendor has taken some liberties with how system management should be structured in their own Redfish implementations.
More Information:
If you want more information about Supermicro's Redfish implementation, please have a look at Supermicro's Redfish documentation.
Sushy-Emulator
The sushy-emulator included with sushy-tools is a very straight-forward implementation. If you wish to know more about how to get this set up for your environment, have a look at the previous article I wrote entitled "Sushy-Emulator: Redfish for the Virtualization Nation".
Part V: Conclusion
So what do you think of all of this? It's not like curl will be the first thing I'll use for Redfish system management, but it's extremely useful to see the API in action and it's a very easy requirement to get started. Have any questions you'd like to ask? Well, follow me on Twitter @v1k0d3n, and send me a shout-out! I'd be happy to help, or take suggestions on making these articles easier.
Also, check out some of the other management tools that I wrote about at the links below: