Quick Overview: The OpenShift NMState Operator
Author: Brandon B. Jozsa
This article is part of a larger OpenShift Operators series, with the goal of providing quick information about installing using Red Hat's official operators.
Table of Contents- Part I: Introduction
- Part II: Installation
- Part III: Network Status via the Web Console
Part I: Introduction
Today we're going to cover the NMState operator; why it exists, what you can do with it, and better still what things you should consider when using it. Are there better options out there? Like any tool in your arsenal, it really depends on what you're trying to accomplish.
Lately, I've been recommending folks to install the NMState operator in pretty much all scenarios. Only in extremely resource constrained environments would I suggest holding off from installing it. That's because it uses so little resources, and it adds a critical WebUI element that I think is really helpful (more on this later).
Part II: Installation
Installing the NMState operator is really easy. Follow the steps below to install and configure the operator for your environment/system(s).
-
You can install the NMState operator with the following command.
oc apply -f - <<EOF
---
apiVersion: v1
kind: Namespace
metadata:
  labels:
    kubernetes.io/metadata.name: openshift-nmstate
    name: openshift-nmstate
    pod-security.kubernetes.io/audit: privileged
    pod-security.kubernetes.io/enforce: privileged
    pod-security.kubernetes.io/warn: privileged
    security.openshift.io/scc.podSecurityLabelSync: "true"
  name: openshift-nmstate

---
apiVersion: operators.coreos.com/v1
kind: OperatorGroup
metadata:
  annotations:
    olm.providedAPIs: NMState.v1.nmstate.io
  name: openshift-nmstate
  namespace: openshift-nmstate
spec:
  targetNamespaces:
  - openshift-nmstate
  upgradeStrategy: Default

---
apiVersion: operators.coreos.com/v1alpha1
kind: Subscription
metadata:
  labels:
    operators.coreos.com/kubernetes-nmstate-operator.openshift-nmstate: ""
  name: kubernetes-nmstate-operator
  namespace: openshift-nmstate
spec:
  channel: stable
  installPlanApproval: Automatic
  name: kubernetes-nmstate-operator
  source: redhat-operators
  sourceNamespace: openshift-marketplace
EOF
The command above will install NMState for any given release (channel is
stableand no release is needed/required). -
Once the operator is installed, you can create a deployment (required) with the following command.
oc apply -f - <<EOF
apiVersion: nmstate.io/v1
kind: NMState
metadata:
  name: nmstate
spec: {}
EOF
This will officially install the NMState environment for your system.
-
Once the deployment is complete, you will get a pop-up in the right-hand side of your WebUI that wants to refresh your OpenShift console. What this adds is a new console widget under Networking > NetworkNodeState.
Part III: Network Status via the Web Console
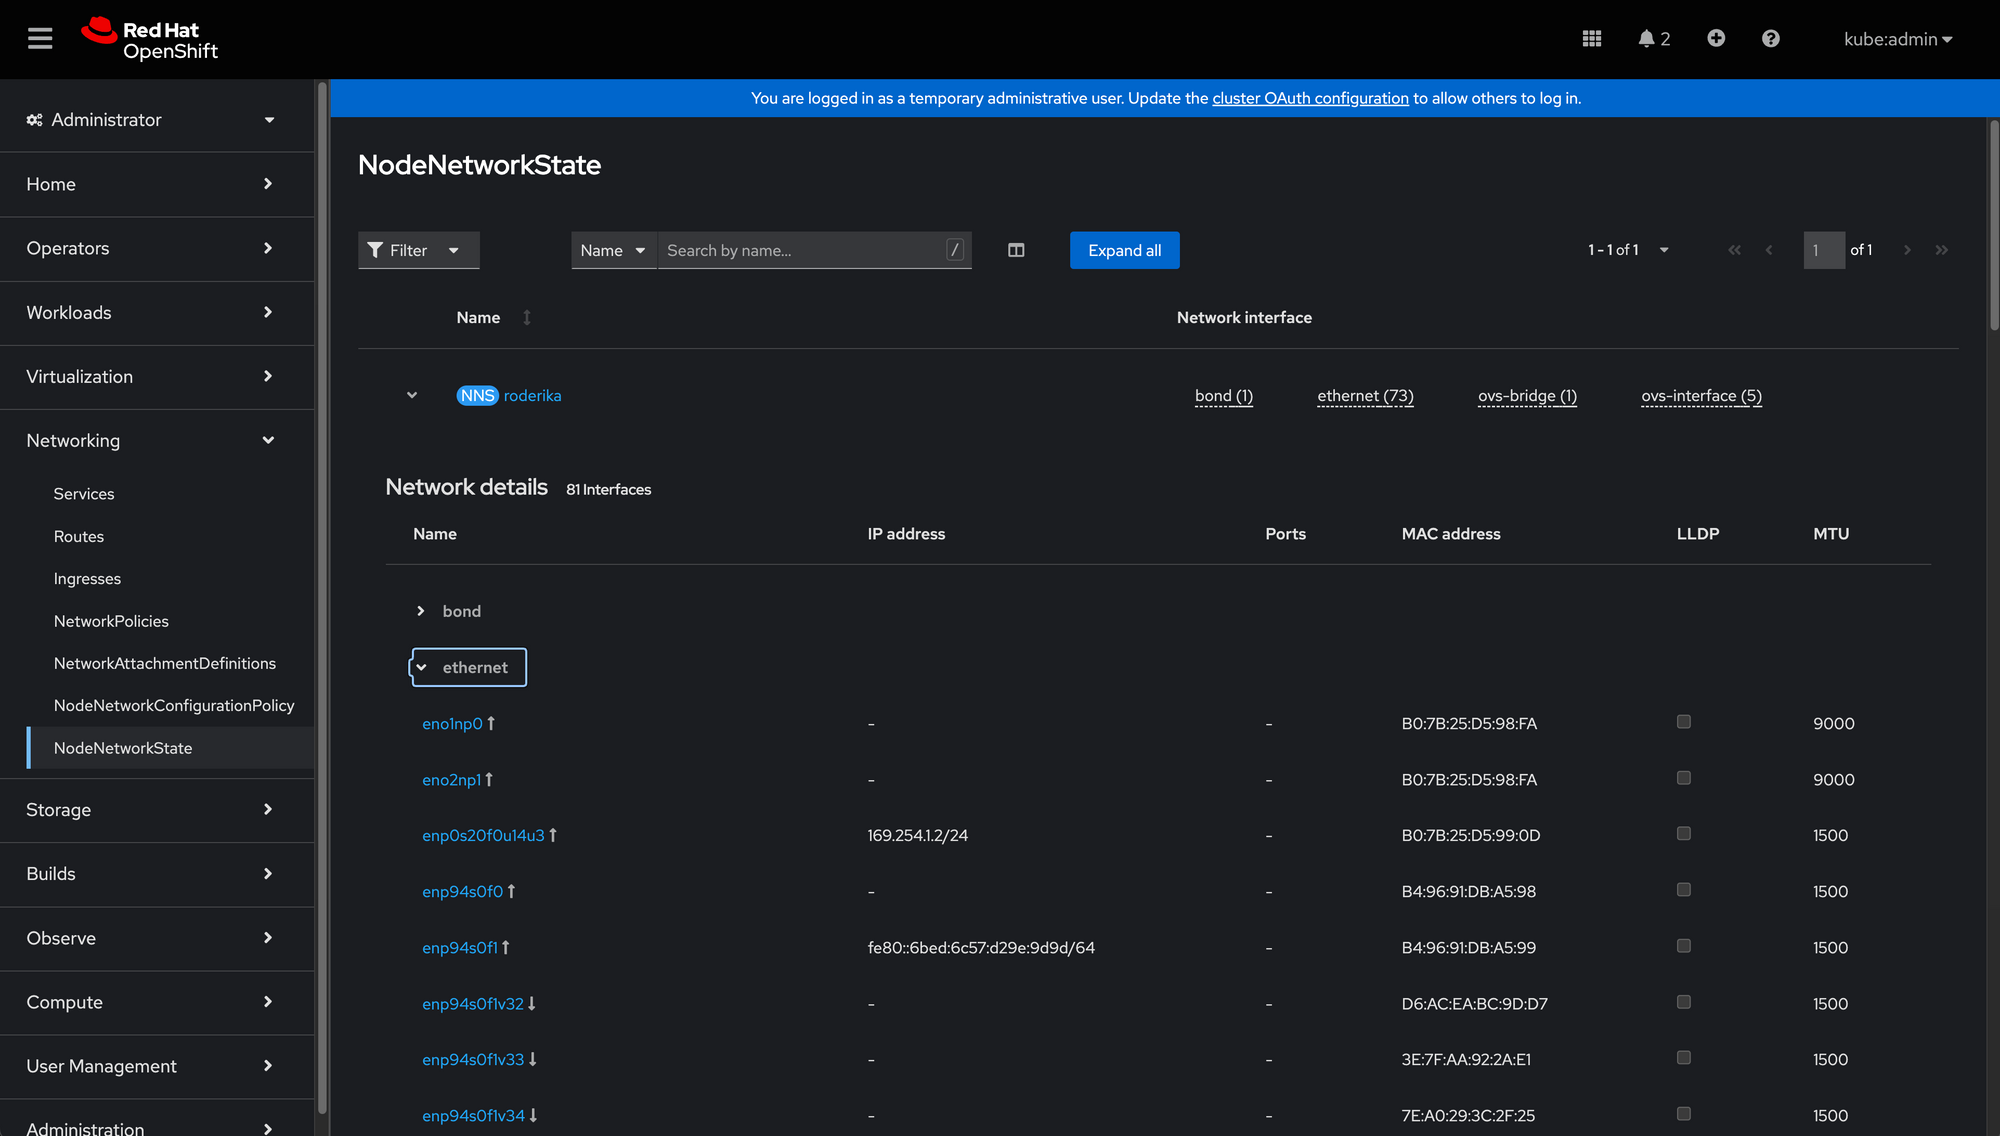
As mentioned in the previous section, you can explore the console widget under Networking > NetworkNodeState. This will provide you with a real-time overview of the network interfaces within your envirnment at any time.
If you're running NMState in a Single Node OpenShift (SNO) environment, then you will only see one "instance" of NMState (in the picture below, this is the hostname roderika. In a multi-node environment, you will see a summary of all nodes in this window, making it easy to see which nodes have specific hardware installed - all in one place.