ZTP for OpenShift Alpha Clusters
Author: Brandon B. Jozsa
"I hear and I forget. I see and I remember. I do and I understand."
- Confucius
- Part I: Introduction
- Part II: Re-thinking Bare Metal Deployments
- Proof of Concept Overview
- Platform Operations
- Field Technicians
- Basic Workflow (Overview)
- Part III: PoC Prerequisites
- Download the openshift-install Binary
- RHEL-based Prerequisite Packages
- Part IV: Demonstration
- Step 1: Create Deployment Manifests
- Step 2: Generate the OpenShift Installation Media
- Step 3: Boot OpenShift Installation Media
- Post-Deployment Troubleshooting
- Accessing the Cluster
- Final Thoughts
- Appendix
Part I: Introduction
I'm so excited for what this year is going to bring for OpenShift users, and today I want to give you a small peek into what our incredible project management and engineering teams have been up to recently.
If you've ever deployed an OpenShift cluster within a cloud provider using an Installer-Provisioned Infrastructure (IPI) deployment method, then you are mostly likely familiar with a utility called openshift-install. There are some very useful and interesting changes coming to this utility with respect to how bare metal can be provisioned. As I describe this functionality, you can think of edge-based scenarios such as RAN or MEC deployments.
A large service provider will have thousands of compute endpoints deployed to the edge for 5G. As they look to disaggregate their infrastructure and use solutions like OpenShift/Kubernetes, the deployments still need to be:
- Reliable
- Repeatable
- Cost-Efficient
- Easy to Install
As service providers continue to evolve and migrate their deployments to Cloud Native patterns, there is one question that I always want to ask:
"Does the overall solution expect your RF Field Engineers to become Kubernetes experts, or has the solution evolved to be more user-friendly for the RF Field Engineers?"
Essentially, I'm asking them if they've really considered the overall cost of migrating to a Cloud Native model. This is an extremely important question, because when there's an issue with something like a RAN device, ideally you want the field technician to focus on the things they know best - troubleshooting radio/RF. Do you really want to walk them through troubleshooting a complex platform in real-time? Do you want to re-train all your RF Engineers, and what does this even look like in terms of cost and overall effort? A Kubernetes platform is supposed to make things easier, not get in the way, make things more complex, or force you to retrain your workforce. So then, how can we make this process reliable, repeatable, cost-effective, and still easy to install? As I always like to do, let's show this with a demonstration.
Part II: Re-thinking Bare Metal Deployments
There's a new sub-command coming to the openshift-install binary called agent, and this is the new feature that I'll be demonstrating today. I've pre-compiled a Linux version of the binary for you (disclaimer coming in the next section), but if you'd rather build it yourself I will include a link in the Appendix at the bottom of this post which will describe how you can build the binary for yourself. For this post, I want to make things as quick and easy as possible.
Proof of Concept Overview
DISCLAIMER: The work described in this blog post is dev-preview at this time (2022/08/20). Keep this in mind as you work through each of the following steps. If you have any issues with the work described below, please feel free to send me an EMAIL.
Also, I want you to think about two distinct groups as you work through this PoC:
- Platform Operations: A team that provides platform details and manifests
- Field Technicians: A team tasked with installing the OpenShift platform in the field
Platform Operations
The Platform Operations team could be anyone who is providing details for the platform installation. They could provide the initial manifests which will be used to generate the ISO, or they could simply provide the resulting ISO. This could actually be an automated process, depending on how a given service provider implement the overall solution. It doesn't have to be a person performing the work, but keep in mind that somehow the resulting manifests or ISO artifact will need to be given to a Field Technician for the remote site installation.
Field Technicians
A Field Technician is simply remote hands. In most cases, this will likely be an RF Field Engineer or Technician, but in practice they can be fairly non-technical for our purposes. We're not asking field technicians to be OpenShift or Kubernetes experts, and there's no additional retraining required to install the OpenShift platform at a remote site. The goal of this demonstration is to demonstrate that anyone can install OpenShift, so-long as they can boot the installation media (either virtually, or through physical media).
Basic Workflow (Overview)
Now that we've discussed the targeted audience for our installation, I want to give a basic overview of the workflow. More details are covered in following sections, where you can perform this work yourself (as an example). But there are really only 3 primary steps after some initial setup:
- Generate ISO installation media (from a single command)
- Hand over the resulting ISO image to a Field Technician
- Boot the installation media, and wait until installation is complete
We're going to cover any prerequisites for the openshift-install application first. Once installed correctly, there are very few requirements to get started. So let's cover this initial, one-time setup now.
Part III: PoC Prerequisites
Download the openshift-install Binary
First, download the openshift-install binary from HERE. Be sure that the binary is in your PATH. You might notice that I am using a python utility called gdown. This utility can make it a little easier to download the binary directly to your local RHEL-based system for testing. You're welcome to use whatever method that works best for you. The following commands should work out of the box.
gdown 1-rJzzyVa9rWvw3yeAuGsTfaaSFLcMY6x
tar zxvf openshift-install.tgz
sudo chmod +x openshift-install
sudo chown root:root openshift-install
sudo mv openshift-install /usr/local/bin/openshift-install
PATH=$PATH:/usr/local/bin
RHEL-based Prerequisite Packages
Once you've downloaded the binary (as described above), make sure to install the following package requirements on your RHEL-based target system. These packages are required. genisoimage will be leveraged to create the resulting ISO artifact, and nmstate will be used to read the networking instructions from an agent.yaml file. I'll provide more information about the agent.yaml later (below).
sudo yum install genisoimage nmstate -yyPart IV: Demonstration
Step 1: Create Deployment Manifests
Now we are ready to create the manifests used for our deployment. The first thing I'd like you to do is to create two directories. The first directory, cluster-manifests, will be used as our working directory. The second directory, cluster-manifests-backup, will be used to store copies of our YAML manifests (as a backup directory). This is because when openshift-install runs it takes the YAML configuration files offered, and converts them into deployable manifests that are then added to the resulting ISO. So once you have a successfully built ISO, your original configuration files will no longer be at the root of the cluster-manifests directory. It's always nice to keep a backup of your original YAML manifests.
Let's create these directories for now, and you will understand this behavior better once you see it in action.
mkdir -p {./cluster-manifests/,./cluster-manifests-backup/}Before customizing the following manifests (install-config.yaml and agent-config.yaml), I want to start you off with manifests that I am absolutely certain work. My goal with this article is to make sure you succeed in creating a bootable ISO image, so for now, use the exact same manifests as a baseline test. I will walk you through customizing this for your environment after you're able to successfully build your first bootable ISO.
Create manifest: install-config.yaml
NOTE: You will be writing the install-config.yaml file to the cluster-manifests directory. So make sure you're in the base directory where you created the two directories called cluster-manifests and cluster-manifests-backup.
[root@aio tmp]# mkdir -p {./cluster-manifests/,./cluster-manifests-backup/}
[root@aio tmp]# ls -asl
total 0
0 drwxr-xr-x. 4 root root  63 Aug 21 12:29 .
0 drwxr-xr-x. 8 root root 190 Aug 21 12:28 ..
0 drwxr-xr-x. 2 root root   6 Aug 21 12:29 cluster-manifests
0 drwxr-xr-x. 2 root root   6 Aug 21 12:29 cluster-manifests-backup
[root@aio tmp]#
Copy/paste the following code block below to create an initial install-config.yaml.
cat << EOF > ./cluster-manifests/install-config.yaml
apiVersion: v1
baseDomain: ztp.dfw.ocp.run
compute:
- name: worker
  replicas: 0
controlPlane:
  name: master
  replicas: 1
metadata:
  name: ztp-ocpsno58
networking:
  clusterNetwork:
  - cidr: 10.128.0.0/14
    hostPrefix: 23
  machineNetwork:
  - cidr: 192.168.3.0/24
  networkType: OVNKubernetes
  serviceNetwork:
  - 172.31.0.0/16
platform:
  none: {}
pullSecret: '$OPENSHIFT_PULL_SECRET'
sshKey: '$SSH_PUBLIC_KEY'
EOF
Did you notice the variables $OPENSHIFT_PULL_SECRET and $SSH_PUBLIC_KEY in the manifest above? Change this to match your own OpenShift pull-secret. You can obtain your OpenShift Pull-Secret from the following link HERE. Look for a section in the main window called "Tokens". There, you will see a "Copy" link next to "Pull secret". Click on that link, and make sure to put the entire output in-between the two single quotes in the manifest above (for the pullSecret key).
Do the same for the $SSH_PUBLIC_KEY. Be sure to place your public key in between the two single quotes.
Create manifest: agent-config.yaml
NOTE: You will be writing the agent-config.yaml file to the cluster-manifests directory.
Next, create an agent-config.yaml in the same way that you did above.
cat << EOF > ./cluster-manifests/agent-config.yaml
apiVersion: v1alpha1
kind: AgentConfig
metadata:
  name: ztp-ocpsno58
rendezvousIP: 192.168.3.58
hosts:
  - hostname: vm-ocp-node58
    interfaces:
     - name: enp1s0
       macAddress: 0e:00:00:03:30:58
    networkConfig:
      interfaces:
        - name: enp1s0
          type: ethernet
          state: up
          mac-address: 0e:00:00:03:30:58
          ipv4:
            enabled: true
            address:
              - ip: 192.168.3.58
                prefix-length: 24
            dhcp: false
      dns-resolver:
        config:
          server:
            - 192.168.3.5
      routes:
        config:
          - destination: 0.0.0.0/0
            next-hop-address: 192.168.3.1
            next-hop-interface: enp1s0
            table-id: 254
EOF
Make sure to copy each of these files into the ./cluster-manifests-backup/ directory as well.
cp ./cluster-manifests/* ./cluster-manifests-backup/The result will look something like the following:
[root@aio demo]# tree .
.
├── cluster-manifests
│   ├── agent-config.yaml
│   └── install-config.yaml
└── cluster-manifests-backup
    ├── agent-config.yaml
    └── install-config.yaml

2 directories, 4 files
[root@aio demo]#
Step 2: Generate the OpenShift Installation Media
There's really only one thing left to do, and that is to generate the installation media! You can do this with the following command.
/usr/local/bin/openshift-install agent create image --log-level debug --dir cluster-manifestsOnce completed, have a look at the cluster-manifests directory. You will notice that you're initial manifests have been replaced with an agent.iso file, and an ./auth directory which includes the kubeconfig file.
[root@aio demo]# tree -a .
.
├── cluster-manifests
│   ├── agent.iso
│   ├── auth
│   │   └── kubeconfig
│   ├── .openshift_install.log
│   └── .openshift_install_state.json
└── cluster-manifests-backup
    ├── agent-config.yaml
    └── install-config.yaml

3 directories, 6 files
[root@aio demo]#
You will also notice a couple of files such as an .openshift_install.log file, as well as a .openshift_install_state.json file. Keep the latter file safe, as it does include sensitive data such as the OpenShift pull-secret.
Step 3: Boot OpenShift Installation Media
All that is left to do now is to boot the bare metal machine or virtual machine to the agent.iso file located in the cluster-manifests directory. To demonstrate this process, I'll be using a RHEL-based QEMU environment.
Now, all my virtual machines are controlled using Redfish. I do this by running sushy-tools, which is running locally on my hypervisor. I wrote a whole blog post about doing this HERE, and you can learn more about controlling virtual machines with Redfish from another blog post I wrote HERE.
Let's assume that we already have a virtual machine created and is controlled via Redfish. This is very similar to how a bare metal host can be managed as well. So the first thing I'm going to do, like aways, is set some variables.
REDFISH_HOST="192.168.3.99"
REDFISH_PORT="8000"
REDFISH_SYSTEM="00000000-0000-0000-0030-000000000058"
REDFISH_MANAGER="00000000-0000-0000-0030-000000000058"
ISO_URL="http://192.168.3.99:8081/agent.iso"
Now let's first turn off the target system with the following command:
curl -s -d '{"ResetType":"ForceOff"}'  \
    -H "Content-Type: application/json" -X POST  \
    http://$REDFISH_HOST:$REDFISH_PORT/redfish/v1/Systems/$REDFISH_SYSTEM/Actions/ComputerSystem.Reset
With the system off, you can verify the ISO status (if it's mounted or not):
curl -s http://$REDFISH_HOST:$REDFISH_PORT/redfish/v1/Managers/$REDFISH_MANAGER/VirtualMedia/Cd/ | jq '[{iso_connected: .Inserted}]'You should get back a response that looks like the following example:
[
  {
    "iso_connected": false
  }
]
Let's get our ISO mounted:
curl -d \
'{"Image":"'"$ISO_URL"'", "Inserted": true}' \
-H "Content-Type: application/json" \
-X POST \
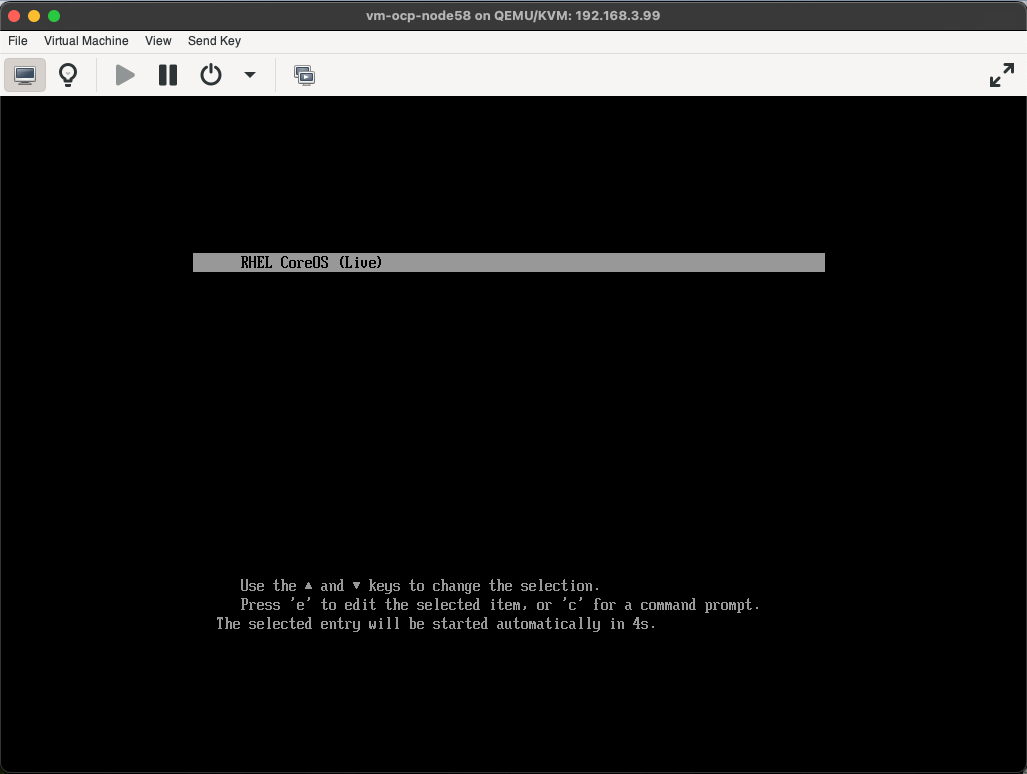
http://$REDFISH_HOST:$REDFISH_PORT/redfish/v1/Managers/$REDFISH_MANAGER/VirtualMedia/Cd/Actions/VirtualMedia.InsertMedia With the ISO mounted via URL, you can now use virt-manager to boot to the ISO:
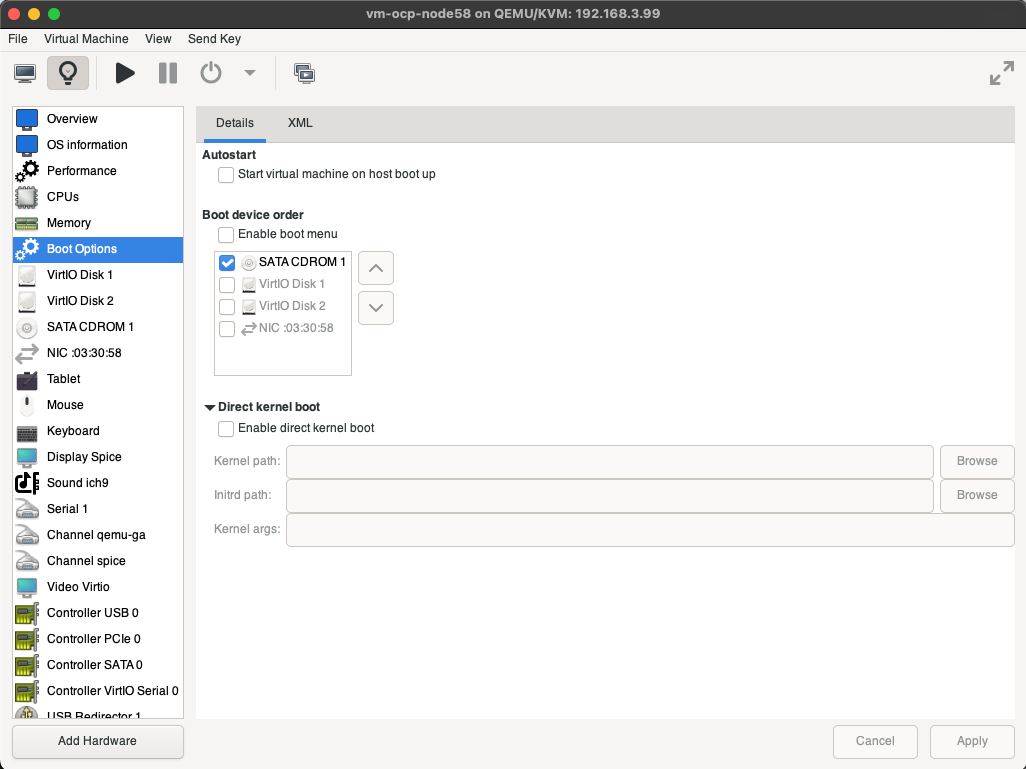
Finally, select the Play icon to start the virtual-machine:
Post-Deployment Troubleshooting
So the virtual machine is up and running, but how do we see what's going on? Do you remember the cluster-manifests/auth/ directory that was created? There's a kubeconfig file located in this directory. Let's use it now to see what's going on with the cluster.
Using openshift-install For Cluster Status
The first, and most commonly used tool for watching cluster events during installation is to leverage the agent utility once again. This can be done with a useful sub-command called wait-for. There are two options for the wait-for subcommand:
bootstrap-completeinstall-complete
Agent Command: bootstrap-complete
Leverage bootstrap-complete during the bootstrap phase (prior to installation-complete). This will monitor bootstrap events, and report these back to the openshift-install agent in real time. Output should look similar to the following when all is going well:
[root@aio auth]# openshift-install agent wait-for bootstrap-complete --dir /root/deployments/openshift/agent/demo/cluster-manifests
INFO Checking for validation failures ----------------------------------------------
ERROR Validation failure found for cluster          category=hosts-data label=all-hosts-are-ready-to-install message=The cluster has hosts that are not ready to install.
ERROR Validation failure found for vm-ocp-node58    category=network label=DNS wildcard not configured message=Parse error for domain name resolutions result
ERROR Validation failure found for vm-ocp-node58    category=network label=NTP synchronization message=Host couldn't synchronize with any NTP server
INFO Checking for validation failures ----------------------------------------------
ERROR Validation failure found for cluster          category=hosts-data label=all-hosts-are-ready-to-install message=The cluster has hosts that are not ready to install.
INFO Pre-installation validations are OK
INFO Cluster is ready for install
INFO Host vm-ocp-node58: updated status from insufficient to known (Host is ready to be installed)
INFO Preparing cluster for installation
INFO Host vm-ocp-node58: updated status from known to preparing-for-installation (Host finished successfully to prepare for installation)
INFO Host vm-ocp-node58: New image status quay.io/openshift-release-dev/ocp-v4.0-art-dev@sha256:b6f2a69fdc1a0844565320fc51316aa79ad6d4661326b30fa606123476c3d9f7. result: success. time: 2.38 seconds; size: 378.98 Megabytes; download rate: 166.94 MBps
INFO Host vm-ocp-node58: updated status from preparing-for-installation to preparing-successful (Host finished successfully to prepare for installation)
INFO Cluster installation in progress
INFO Host vm-ocp-node58: updated status from preparing-successful to installing (Installation is in progress)
INFO Host: vm-ocp-node58, reached installation stage Installing: bootstrap
INFO Host: vm-ocp-node58, reached installation stage Waiting for bootkube
INFO Host: vm-ocp-node58, reached installation stage Writing image to disk
INFO Host: vm-ocp-node58, reached installation stage Writing image to disk: 5%
INFO Host: vm-ocp-node58, reached installation stage Writing image to disk: 10%
INFO Host: vm-ocp-node58, reached installation stage Writing image to disk: 15%
INFO Host: vm-ocp-node58, reached installation stage Writing image to disk: 22%
INFO Host: vm-ocp-node58, reached installation stage Writing image to disk: 28%
INFO Host: vm-ocp-node58, reached installation stage Writing image to disk: 33%
INFO Host: vm-ocp-node58, reached installation stage Writing image to disk: 38%
INFO Host: vm-ocp-node58, reached installation stage Writing image to disk: 43%
INFO Host: vm-ocp-node58, reached installation stage Writing image to disk: 48%
INFO Host: vm-ocp-node58, reached installation stage Writing image to disk: 53%
INFO Host: vm-ocp-node58, reached installation stage Writing image to disk: 59%
INFO Host: vm-ocp-node58, reached installation stage Writing image to disk: 64%
INFO Host: vm-ocp-node58, reached installation stage Writing image to disk: 69%
INFO Host: vm-ocp-node58, reached installation stage Writing image to disk: 74%
INFO Host: vm-ocp-node58, reached installation stage Writing image to disk: 79%
INFO Host: vm-ocp-node58, reached installation stage Writing image to disk: 85%
INFO Host: vm-ocp-node58, reached installation stage Writing image to disk: 90%
INFO Host: vm-ocp-node58, reached installation stage Writing image to disk: 95%
INFO Host: vm-ocp-node58, reached installation stage Writing image to disk: 100%
INFO Host: vm-ocp-node58, reached installation stage Rebooting
The basic rule that I personally follow is that when the image is being written to disk, the installation will more than likely succeed, of course barring any cluster configuration issues. When the boostrap-complete command reports that the host is Rebooting, you can starting leveraging the installation-complete sub-command.
Agent Command: installation-complete
Leverage the installation-complete sub-command to monitor the cluster installation process, after the bootstrap process has completed.
Direct Host Troubleshooting
One other option that can be leveraged during the installation, as always, is direct host access monitoring. If you've noticed in our install-config.yaml manifests, an SSH public key was declared (L24 sshKey). You can use this to access the host at any point during the installation process for the cluster.
Probably one of the most interesting aspects of leveraging this method for troubleshooting is what you will find running on the RHCOS host during the initial boot: the now very popular Assisted-Service.
[core@vm-ocp-node58 ~]$ sudo podman ps -a
CONTAINER ID  IMAGE                                                                                                                   COMMAND               CREATED         STATUS             PORTS                                                                   NAMES
1647bf195525  localhost/podman-pause:4.0.2-1655280389                                                                                                       37 seconds ago  Up 27 seconds ago  0.0.0.0:8080->8080/tcp, 0.0.0.0:8090->8090/tcp, 0.0.0.0:8888->8888/tcp  5f1b51de8531-infra
14d1df9b175d  quay.io/openshift-release-dev/ocp-v4.0-art-dev@sha256:d8def7241e1707b99bd445a4764477cb24c180175836fae35589fedb1ad892df  /bin/bash start_d...  14 seconds ago  Up 14 seconds ago  0.0.0.0:8080->8080/tcp, 0.0.0.0:8090->8090/tcp, 0.0.0.0:8888->8888/tcp  assisted-db
725d5f0fd2bf  quay.io/openshift-release-dev/ocp-v4.0-art-dev@sha256:d8def7241e1707b99bd445a4764477cb24c180175836fae35589fedb1ad892df  /assisted-service     14 seconds ago  Up 14 seconds ago  0.0.0.0:8080->8080/tcp, 0.0.0.0:8090->8090/tcp, 0.0.0.0:8888->8888/tcp  service
610bb4d4c571  quay.io/openshift-release-dev/ocp-v4.0-art-dev@sha256:d8def7241e1707b99bd445a4764477cb24c180175836fae35589fedb1ad892df  /usr/local/bin/ag...  6 seconds ago   Up 6 seconds ago   0.0.0.0:8080->8080/tcp, 0.0.0.0:8090->8090/tcp, 0.0.0.0:8888->8888/tcp  apply-host-config
ec05ce2d17b8  quay.io/openshift-release-dev/ocp-v4.0-art-dev@sha256:51d89602f11aaae4b3e950f54274567d19bec74b86dad054e60ce56c893476b3  next_step_runner ...  3 seconds ago   Up 3 seconds ago                                                                           next-step-runner
[core@vm-ocp-node58 ~]$
You see, the ISO which is generated with the openshift-install binary has everything it needs to create a full cluster (in terms of bootstrapping). If you're familiar with the Assisted-Service for bare metal deployments, than you will notice this work is reused to simplify the overall deployment of OpenShift out in the field. I'll write up more information on how this is useful, and what other things this can be leveraged for in an upcoming blog post.
Accessing the Cluster
No doubt, you've already noticed the kubeconfig located in the auth/ directory, once openshift-install agent ran successfully.
But you may be asking yourself: "Where can I find the kubeadmin password?"
This is currently something being worked out by the engineering team, but for now we do have a useful workaround. Generally this method can be used to recover (really it's replace) any kubeadmin password, so-long as you have the kubeconfig file. So let's try to patch in a new kubeadmin password, so we can access the cluster.
First, export the kubeconfig that was generated from the openshift-install agent command:
export KUBECONFIG=/root/deployments/openshift/agent/demo/cluster-manifests/auth/kubeconfigNext, run the following container utility (I'm obviously using Podman, but it doesn't matter what you use):
podman run -t quay.io/bjozsa-redhat/kubeadmin-reset:latestThe result should look like the following:
[root@aio auth]# podman run -t quay.io/bjozsa-redhat/kubeadmin-reset:latest
Actual Password: qSxz5-EngnK-oyuCe-zxePE
Hashed Password: $2a$10$6f6FiC7fYrIdD7ba08J4vOKoFQQjAZn6WfxItdbkhtnan6FkBi8P2
Data to Change in Secret: JDJhJDEwJDZmNkZpQzdmWXJJZEQ3YmEwOEo0dk9Lb0ZRUWpBWm42V2Z4SXRkYmtodG5hbjZGa0JpOFAy
[root@aio auth]#
Next, use the data provided on the line entitled "Data to Change in Secret", and patch this into the following command:
[root@aio auth]# oc patch secret -n kube-system kubeadmin --type json -p '[{"op": "replace", "path": "/data/kubeadmin", "value": "JDJhJDEwJDZmNkZpQzdmWXJJZEQ3YmEwOEo0dk9Lb0ZRUWpBWm42V2Z4SXRkYmtodG5hbjZGa0JpOFAy"}]'
secret/kubeadmin patched
[root@aio auth]#
And now you should be able to access the WebUI with your newly created kubeadmin password!
Final Thoughts
And that's it! Seriously. With this solution, service providers aren't required to re-train RF Engineers/Technicians to be Kubernetes experts. In fact, this process is more like installing an appliance rather than a full OS with OpenShift/Kubernetes. This is the difference with where OpenShift is at in the market today: we're working with real customers, and being empathetic to their current organizational structure and workflow. Rather than asking our users to bend to what we think is best, we're adjusting our software to work best for them. It's what makes working at Red Hat, and treating our customers as legitimate parters, so rewarding.
Appendix
I don't want to leave you with a non-useful demonstration, but rather, I want to help you customize your deployments as well. Consider these follow-up articles, now that you have a gasp what we're doing.
- OpenShift-Install Agent: Deep Dive and Technical Troubleshooting
- OpenShift-Install Agent: Overriding Deployed Cluster Version
- OpenShift-Install Agent: Leveraging ZTP Manifests
- OpenShift-Install Agent: Generating First Time Kubeadmin Password
- OpenShift-Install Agent: Compact and Multi-Node Cluster Deployments
- OpenShift-Install Agent: Using a Private Registry