OCP Agent-based Install with extra manifests, Calico
Author: Motohiro Abe
Table of Contents- Introduction
- High-Level Procedures
- Install-config and agent-config preparation
- ZTP manifest creation
- Calico manifest preparation
- Create the agent image
- Deploy!
- Complete
- Conclusion
- References
Introduction
The Agent-Based Installation is a powerful method, particularly valuable for on-premise and disconnected environments. In this blog post, I am going to guide you through the process of an agent-based installation by incorporating additional manifests. Such integration becomes necessary, especially when dealing with third-party Container Network Interface (CNI) setups that must be established during installation. Throughout this post, I will demonstrate how to integrate the Calico manifest into the agent-based installation and shed light on some unique challenges I encountered along the way.
Disclaimer
Please note that the deployment process and techniques described in this blog post are the result of my personal experimentation and exploration. This blog post does not represent official support or endorsed by Red Hat (RH) or any other vendor. The information shared is solely for educational and informational purposes.
High-Level Procedures
-
Install-config and agent-config File Preparation:
We need to prepare the necessary configuration files, namely the install-config.yaml and agent-config.yaml. -
Ztp Manifest Creation:
To facilitate the installation, we will leverage GitOps Zero Touch Provisioning (ZTP) custom resource (CR) objects. ZTP files will be auotmatically generated by the above two files and it allows to futher customize. -
Calico Manifest Preparation:
Now that we have the ZTP manifest, we'll prepare the Calico manifest, tailoring it to meet the requirements of the agent-based installation. -
Agent-Based Image Creation:
We'll proceed to create the agent-based image. This image will encapsulate the customized installation settings, including the Calico manifest! -
Deployment:
Finally, it's time to deploy the agent-based installation with the integrated Calico manifests. This step consists of two sub-steps:
a. Boot VMs and Wait for Bootstrap:
We'll boot the target virtual machines and wait for the bootstrap process to open the API.
b. Add Calico Installation CRD during Bootstrap:
During the bootstrap process, we'll add one Calico Installation Custom Resource Definition (CRD) to the install process.
Install-config and agent-config preparation
To begin the agent-based installation, we first need to prepare two essential files: install-config.yaml and agent-config.yaml.
install-config.yaml: This file defines the installation based on specific cluster requirements. Make sure to update pull secrets and SSH keys as necessary. At this stage, the networktype remains unchanged. If you are using a private repository, remember to update TLS and image content sources accordingly.
agent-config.yaml: In this file, we define configurations based on each baremetal host. Such as rootdevice hint, and mac address of each interface are configured.
Make sure to refer to the product documentation for further details.
install-config.yaml
apiVersion: v1
baseDomain: cotton.blue
compute:
- architecture: amd64
  hyperthreading: Enabled
  name: worker
  replicas: 3
controlPlane:
  architecture: amd64
  hyperthreading: Enabled
  name: master
  replicas: 3
metadata:
  name: hub
networking:
  clusterNetwork:
  - cidr: 10.128.0.0/14
    hostPrefix: 23
  machineNetwork:
  - cidr: 192.168.1.0/24
  networkType: OVNKubernetes
  serviceNetwork:
  - 172.30.0.0/16
platform:
  baremetal:
    apiVIPs:
    - 192.168.1.125
    ingressVIPs:
    - 192.168.1.126
pullSecret: '{"auths":{"registry1.cotton.blue:8443":{"auth":"aW5pdDpjaGFuZ2VtZQ==","email":"mabe@redhat.com"}}}'
sshKey: |
<your ssh key>
additionalTrustBundle: |
  -----BEGIN CERTIFICATE-----
<your registry cert>
  -----END CERTIFICATE-----
imageContentSources:
  - mirrors:
    - registry1.cotton.blue:8443/mirror/ubi8
    source: registry.access.redhat.com/ubi8
  - mirrors:
    - registry1.cotton.blue:8443/mirror/ubi8
    source: registry.redhat.io/ubi8
  - mirrors:
    - registry1.cotton.blue:8443/mirror/container-native-virtualization
    source: registry.redhat.io/container-native-virtualization
  - mirrors:
    - registry1.cotton.blue:8443/mirror/openshift-update-service
    source: registry.redhat.io/openshift-update-service
  - mirrors:
    - registry1.cotton.blue:8443/mirror/openshift4
    source: registry.redhat.io/openshift4
  - mirrors:
    - registry1.cotton.blue:8443/mirror/nvidia
    source: nvcr.io/nvidia
  - mirrors:
    - registry1.cotton.blue:8443/mirror/nvidia
    source: registry.connect.redhat.com/nvidia
  - mirrors:
    - registry1.cotton.blue:8443/mirror/odf4
    source: registry.redhat.io/odf4
  - mirrors:
    - registry1.cotton.blue:8443/mirror/oadp
    source: registry.redhat.io/oadp
  - mirrors:
    - registry1.cotton.blue:8443/mirror/lvms4
    source: registry.redhat.io/lvms4
  - mirrors:
    - registry1.cotton.blue:8443/mirror/rhceph
    source: registry.redhat.io/rhceph
  - mirrors:
    - registry1.cotton.blue:8443/mirror/multicluster-engine
    source: registry.redhat.io/multicluster-engine
  - mirrors:
    - registry1.cotton.blue:8443/mirror/rhel8
    source: registry.redhat.io/rhel8
  - mirrors:
    - registry1.cotton.blue:8443/mirror/rhmtc
    source: registry.redhat.io/rhmtc
  - mirrors:
    - registry1.cotton.blue:8443/mirror/rhacm2
    source: registry.redhat.io/rhacm2
  - mirrors:
    - registry1.cotton.blue:8443/mirror/openshift-gitops-1
    source: registry.redhat.io/openshift-gitops-1
  - mirrors:
    - registry1.cotton.blue:8443/mirror/cert-manager
    source: registry.redhat.io/cert-manager
  - mirrors:
    - registry1.cotton.blue:8443/mirror/rh-sso-7
    source: registry.redhat.io/rh-sso-7
  - mirrors:
    - registry1.cotton.blue:8443/mirror/openshift/release
    source: quay.io/openshift-release-dev/ocp-v4.0-art-dev
  - mirrors:
    - registry1.cotton.blue:8443/mirror/openshift/release-images
    source: quay.io/openshift-release-dev/ocp-release
agent-config.yaml
apiVersion: v1alpha1
kind: AgentConfig
metadata:
  name: hub
rendezvousIP: 192.168.1.113
hosts:
  - hostname: master1
    role: master
    rootDeviceHints:
      deviceName: /dev/vda
    interfaces:
      - name: eno1
        macAddress: 52:54:00:2a:45:c6
    networkConfig:
      interfaces:
        - name: eno1
          type: ethernet
          state: up
          mac-address: 52:54:00:2a:45:c6
          ipv4:
            enabled: true
            dhcp: true
          ipv6:
            enabled: false
            dhcp: false
  - hostname: master2
    role: master
    rootDeviceHints:
      deviceName: /dev/vda
    interfaces:
      - name: eno1
        macAddress: 52:54:00:c3:4b:67
    networkConfig:
      interfaces:
        - name: eno1
          type: ethernet
          state: up
          mac-address: 52:54:00:c3:4b:67
          ipv4:
            enabled: true
            dhcp: true
          ipv6:
            enabled: false
            dhcp: false
  - hostname: master3
    role: master
    rootDeviceHints:
      deviceName: /dev/vda
    interfaces:
      - name: eno1
        macAddress: 52:54:00:7c:76:94
    networkConfig:
      interfaces:
        - name: eno1
          type: ethernet
          state: up
          mac-address: 52:54:00:7c:76:94
          ipv4:
            enabled: true
            dhcp: true
          ipv6:
            enabled: false
            dhcp: false
  - hostname: worker1
    role: worker
    rootDeviceHints:
      deviceName: /dev/vda
    interfaces:
      - name: eno1
        macAddress: 52:54:00:f4:f4:d4
    networkConfig:
      interfaces:
        - name: eno1
          type: ethernet
          state: up
          mac-address: 52:54:00:f4:f4:d4
          ipv4:
            enabled: true
            dhcp: true
          ipv6:
            enabled: false
            dhcp: false
  - hostname: worker2
    role: worker
    rootDeviceHints:
      deviceName: /dev/vda
    interfaces:
      - name: eno1
        macAddress: 52:54:00:5e:b6:e5
    networkConfig:
      interfaces:
        - name: eno1
          type: ethernet
          state: up
          mac-address: 52:54:00:5e:b6:e5
          ipv4:
            enabled: true
            dhcp: true
          ipv6:
            enabled: false
            dhcp: false
  - hostname: worker3
    role: worker
    rootDeviceHints:
      deviceName: /dev/vda
    interfaces:
      - name: eno1
        macAddress: 52:54:00:34:a6:3d
    networkConfig:
      interfaces:
        - name: eno1
          type: ethernet
          state: up
          mac-address: 52:54:00:34:a6:3d
          ipv4:
            enabled: true
            dhcp: true
          ipv6:
            enabled: false
            dhcp: false
Once you’ve prepared these files, create an "ocp-calico" folder to store the artifacts. The folder structure should now resemble the following:
$ tree
.
├── agent-config.yaml
├── install-config.yaml
└── ocp-calico
ZTP manifest creation
In this section, we explore the process of generating the Zero Touch Provisioning (ZTP) manifest for the agent-based installation.
The ZTP manifest creation begins with incorporating data from the previously prepared agent-config.yaml and install-config.yaml files. These files contain the necessary configurations to customize the installation, including extra manifests.
To generate the ZTP manifest, follow these steps:
- Copy the agent-config.yaml and install-config.yaml files to the new folder "ocp-calico":
# cp agent-config.yaml ./ocp-calico
# cp install-config.yaml ./ocp-calico
- Navigate to the "ocp-calico" folder:
# cd ocp-calico
- Execute the following command to create the ZTP manifest:
# openshift-install agent create cluster-manifests
INFO Consuming Install Config from target directory
INFO Consuming Agent Config from target directory
INFO Cluster-Manifests created in: cluster-manifests and mirror
The ZTP manifest will be generated and stored in the "cluster-manifests" directory, located within "ocp-calico." Additionally, a "mirror" folder will contain the required certificates and registry configurations.
This is what it looks like from the working folder.
$ tree
├── agent-config.yaml
├── install-config.yaml
└── ocp-calico
    ├── cluster-manifests
    │   ├── agent-cluster-install.yaml
    │   ├── cluster-deployment.yaml
    │   ├── cluster-image-set.yaml
    │   ├── infraenv.yaml
    │   ├── nmstateconfig.yaml
    │   └── pull-secret.yaml
    └── mirror
        ├── ca-bundle.crt
        └── registries.conf
Calico manifest preparation
In this section, we'll prepare the Calico manifest for the agent-based installation. Follow these steps to obtain and organize them:
Get the manifest according to calico's instructions.
- Create a folder named "calico" in the working directory.
# mkdir calico
- Download the Calico manifests according to the instructions:
# wget -qO- https://github.com/projectcalico/calico/releases/download/v3.26.1/ocp.tgz | tar xvz --strip-components=1 -C calico
- Copy the contents of the "calico" folder to the "openshift" folder under "ocp-calico":
cp -rf calico/* ocp-calico/openshift/
By following these steps, we have placed the Calico manifests inside the "openshift" folder, which resides under "ocp-calico” in our setup. This folder naming is important, as the agent-based installer requires it to locate the extra manifest during boot image creation.
At this point, the folder structure should appear as follows:
.
├── calico
└── ocp-calico
    ├── cluster-manifests
    │   ├── agent-cluster-install.yaml
    │   ├── cluster-deployment.yaml
    │   ├── cluster-image-set.yaml
    │   ├── infraenv.yaml
    │   ├── nmstateconfig.yaml
    │   └── pull-secret.yaml
    ├── mirror
    │   ├── ca-bundle.crt
    │   └── registries.conf
    └── openshift
        ├── 00-namespace-calico-apiserver.yaml
        ├── 00-namespace-calico-system.yaml
        ├── 00-namespace-tigera-operator.yaml
        ├── 01-cr-apiserver.yaml
        ├── 01-cr-installation.yaml
        ├── 02-configmap-calico-resources.yaml
        ├── 02-rolebinding-tigera-operator.yaml
        ├── 02-role-tigera-operator.yaml
        ├── 02-serviceaccount-tigera-operator.yaml
        ├── 02-tigera-operator.yaml
        ├── crd.projectcalico.org_bgpconfigurations.yaml
        ├── crd.projectcalico.org_bgpfilters.yaml
        ├── crd.projectcalico.org_bgppeers.yaml
        ├── crd.projectcalico.org_blockaffinities.yaml
        ├── crd.projectcalico.org_caliconodestatuses.yaml
        ├── crd.projectcalico.org_clusterinformations.yaml
        ├── crd.projectcalico.org_felixconfigurations.yaml
        ├── crd.projectcalico.org_globalnetworkpolicies.yaml
        ├── crd.projectcalico.org_globalnetworksets.yaml
        ├── crd.projectcalico.org_hostendpoints.yaml
        ├── crd.projectcalico.org_ipamblocks.yaml
        ├── crd.projectcalico.org_ipamconfigs.yaml
        ├── crd.projectcalico.org_ipamhandles.yaml
        ├── crd.projectcalico.org_ippools.yaml
        ├── crd.projectcalico.org_ipreservations.yaml
        ├── crd.projectcalico.org_kubecontrollersconfigurations.yaml
        ├── crd.projectcalico.org_networkpolicies.yaml
        ├── crd.projectcalico.org_networksets.yaml
        ├── operator.tigera.io_apiservers_crd.yaml
        ├── operator.tigera.io_imagesets_crd.yaml
        ├── operator.tigera.io_installations_crd.yaml
        └── operator.tigera.io_tigerastatuses_crd.yaml
The Calico manifests are now properly organized, setting the stage for a little bit of modifications.
ocp-calico/agent-cluster-install.yaml
Add an annotation to agnet-cluster-install.yaml to designate Calico as a CNI. Please add the following into the file.
 annotations:
   agent-install.openshift.io/install-config-overrides: '{"networking":{"networkType":"Calico"}}'
updated ocp-calico/agent-cluster-install.yaml
metadata:
  creationTimestamp: null
  name: hub
  annotations:
    agent-install.openshift.io/install-config-overrides: '{"networking":{"networkType":"Calico"}}'
spec:
  apiVIP: 192.168.1.125
  clusterDeploymentRef:
    name: hub
  imageSetRef:
    name: openshift-4.13.4
  ingressVIP: 192.168.1.126
  networking:
    clusterNetwork:
    - cidr: 10.128.0.0/14
      hostPrefix: 23
    machineNetwork:
    - cidr: 192.168.1.0/24
    serviceNetwork:
    - 172.30.0.0/16
  platformType: BareMetal
  provisionRequirements:
    controlPlaneAgents: 3
    workerAgents: 3
  sshPublicKey: ssh-rsa AAAAB3NzaC1yc2EAAAADAQABAAABgQD2Sh84/z9jj4Neg4xI3jlPO6C8sLdz3ykJjo+vD+WveOSBql2LiJ1k4z/AcBC55/ZPfZt6oK1pqtHYTIcZLobH7ApHvRSdsDmVgh67u/Lx5XMZ5ct6O9jC+lp98vNjGP5c9Zfcn1zIzcPATleOS52ubGQJA58ryuckoEq6TyyfvcHjUMNBv7AULDQ68syv0i9tuS+SH9cUgaEQGHsTyL9wA5fudh2JpLMvZigE0KqAwP/Z91QLyMFZsuxoy7x0CFBFym4miXiF7gVSpYsJxcUbb6qRSeHi4PGhNBm3IytRcbTOrwcdCx2E2uiyuWliC85NtMslQHYy+8eXcUavSW3GZnxgjenUnaNAIhQ1GQdUAdRmsLCzRehzBi/i3mc4ZgkhODQHacCg14RKj7c5GgyAh3b/6M9D43sqrjZa2vH1+RwID9wgWngVjJmy/RZ3tIhT94GKUn4/AWfAUpAtM1c3C1sxqRFTk6Q9otYm1Qq95/V0ewBQnbuzkpJSlCjtNqM=
    mabe@mabe.remote.csb
status:
  debugInfo:
    eventsURL: ""
    logsURL: ""
  progress:
    totalPercentage: 0
ocp-calico/mirror/registry.conf
In case, to configure Calico images from a private registry, update registry.conf:
[[registry]]
 location = "quay.io/tigera"
 mirror-by-digest-only = true
 prefix = ""


 [[registry.mirror]]
   location = "registry1.cotton.blue:8443/mirror/tigera"


[[registry]]
 location = "docker.io/calico"
 mirror-by-digest-only = true
 prefix = ""


 [[registry.mirror]]
   location = "registry1.cotton.blue:8443/mirror/calico"
(Note: I had a problem with docker.io in my environment that nodes complained about docker.io domain format. I am currently investigating the issue, and I will update this configuration as soon as there is progress. In my lab, I allowed it from the external registry.)
Remove openshift/operator.tigera.io_installations_crd.yaml
We'll remove the openshift/operator.tigera.io_installations_crd.yaml file from the folder to overcome size limitations during image creation. This file has a size of 1M, and the maximum size of total of the extra manifest should not exceed 254K. The size constraint is influenced by the file "ignition.img" in the Base CoreOS ISO.
Navigate to the folder containing the file:
# cd ocp-calico/openshift
Move the operator.tigera.io_installations_crd.yaml file to a different location outside the folder:
# mv operator.tigera.io_installations_crd.yaml ./../../
We've saved the file for later use, and now we're ready to continue with the agent-based image creation process.
Create the agent image
We'll proceed with generating the agent ISO, which will encapsulate all the configurations and manifests for the agent-based installation with Calico. Follow these steps in the working folder:
- Create image with openshift-installer
# openshift-install --dir ocp-calico agent create image
INFO The rendezvous host IP (node0 IP) is 192.168.1.113
INFO Extracting base ISO from release payload
INFO Verifying cached file
INFO Using cached Base ISO /home/mabe/.cache/agent/image_cache/coreos-x86_64.iso
INFO Consuming InfraEnv Config from target directory
INFO Consuming Extra Manifests from target directory
INFO Consuming AgentClusterInstall Config from target directory
INFO Consuming ClusterDeployment Config from target directory
INFO Consuming ClusterImageSet Config from target directory
INFO Consuming Mirror Registries Certificate File from target directory
INFO Consuming NMState Config from target directory
INFO Consuming Mirror Registries Config from target directory
INFO Consuming Agent PullSecret from target directory
- Check the arthifacts
# ls ./ocp-calico/
agent.x86_64.iso  auth  rendezvousIP
The agent.x86_64.iso file will be created within the "ocp-calico" folder. This ISO file contains everything required to boot each node and initiate the agent-based installation process with Calico manifest integration.
Now, it's time to proceed with the booting of each node using the generated agent ISO.
Deploy!
To deploy the agent-based installation with the newly generated ISO image, follow these steps:
- Copy the agent.x86_64.iso image to the KVM host (veterans) using rsync:
rsync --rsync-path="sudo rsync" agent.x86_64.iso mabe@veterans:/var/lib/libvirt/images/
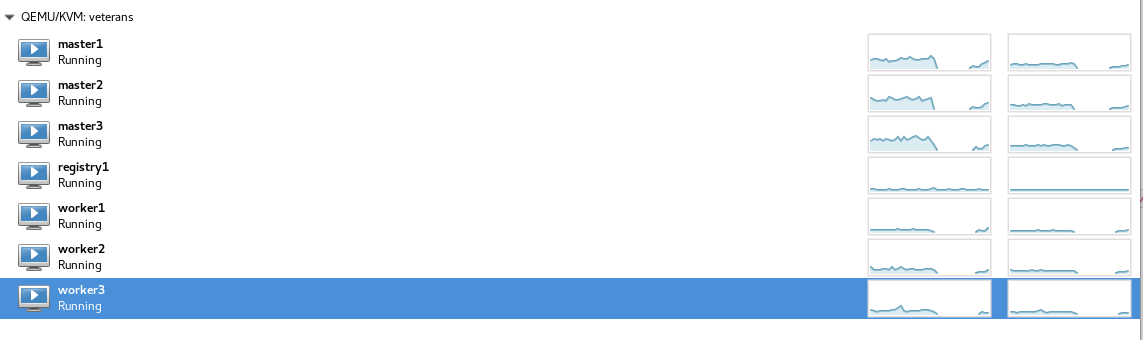
- Launch the virtual machine (VM) using the copied ISO image as the first boot order. For specific instructions on launching the VMs, please refer to my git repository containing the information for those VMs and KVM host setup.
In this phase, we'll monitor the bootstrap status using openshift-install command, open additional terminals for further tasks, and interact with the API to transfer/create the Calico Custom Resource Definitions (CRD) that we saved previously.
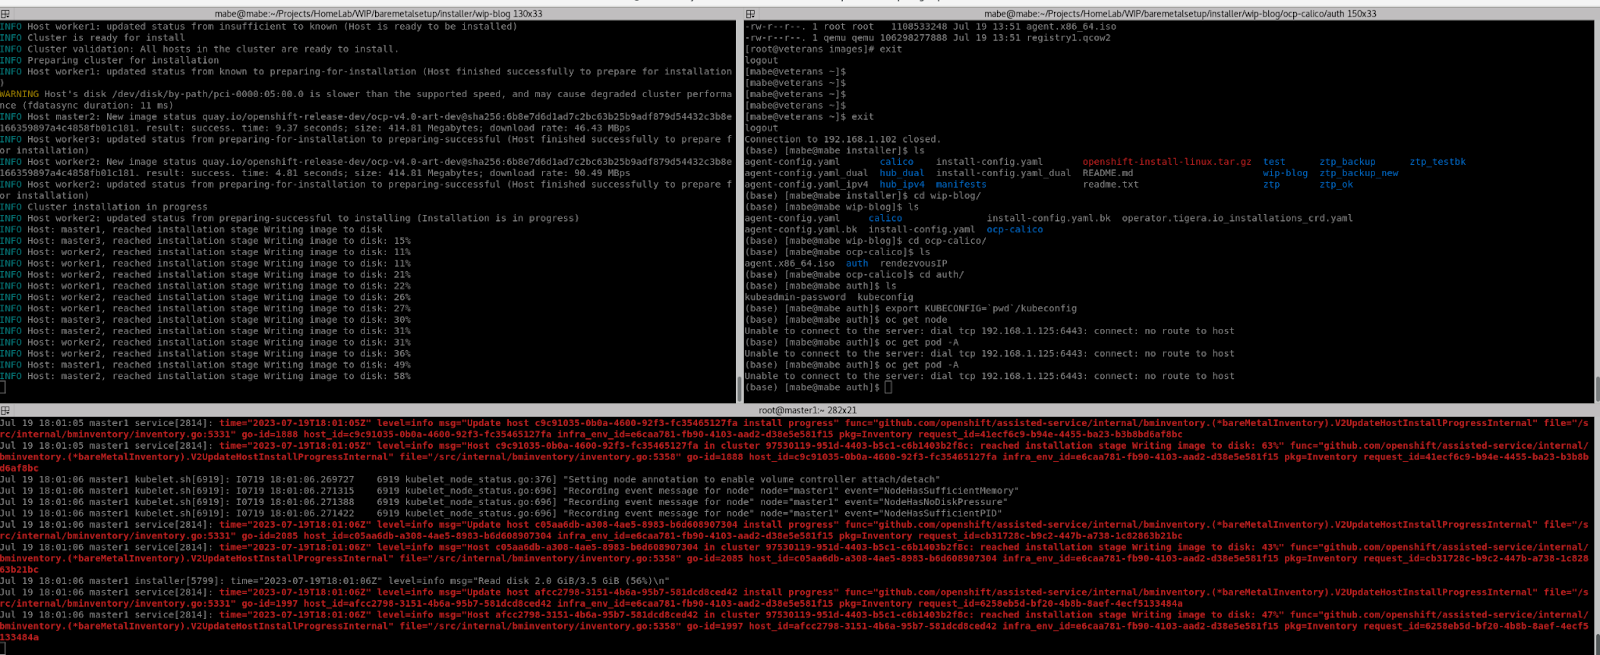
- Monitor Bootstrap Status:
Use openshift-install to monitor the bootstrap process and wait until it completes. Open a terminal and run the following command from the "ocp-calico" directory:
# openshift-install --dir ocp-calico agent wait-for bootstrap-complete --log-level=info
This command will track the bootstrap status and wait for it to complete.
4.Prepare for API Calls:
Set the KUBECONFIG environment variable:
# cd ocp-calico/auth
# export KUBECONFIG=$(pwd)/kubeconfig
- Apply one Calico CRD
Keep an eye on the progress of the deployment by periodically checking the pods using “oc get pod”. As the API becomes responsive, we will apply the last piece of Calico CRD immediately. Setting --server-side=true is necessary when applying the CRD file because the file size is large.
# ls ./../../
agent-config.yaml  calico  install-config.yaml  ocp-calico  operator.tigera.io_installations_crd.yaml
# oc apply -f ./../../operator.tigera.io_installations_crd.yaml --server-side=true
customresourcedefinition.apiextensions.k8s.io/installations.operator.tigera.io serverside-applied
Checking ....
# oc get crd -A | grep calico
bgpconfigurations.crd.projectcalico.org                     2023-07-19T18:03:45Z
bgpfilters.crd.projectcalico.org                            2023-07-19T18:03:45Z
bgppeers.crd.projectcalico.org                              2023-07-19T18:03:45Z
blockaffinities.crd.projectcalico.org                       2023-07-19T18:03:46Z
caliconodestatuses.crd.projectcalico.org                    2023-07-19T18:03:46Z
clusterinformations.crd.projectcalico.org                   2023-07-19T18:03:47Z
felixconfigurations.crd.projectcalico.org                   2023-07-19T18:03:47Z
globalnetworkpolicies.crd.projectcalico.org                 2023-07-19T18:03:47Z
globalnetworksets.crd.projectcalico.org                     2023-07-19T18:03:48Z
hostendpoints.crd.projectcalico.org                         2023-07-19T18:03:48Z
ipamblocks.crd.projectcalico.org                            2023-07-19T18:03:49Z
ipamconfigs.crd.projectcalico.org                           2023-07-19T18:03:49Z
ipamhandles.crd.projectcalico.org                           2023-07-19T18:03:49Z
ippools.crd.projectcalico.org                               2023-07-19T18:03:50Z
ipreservations.crd.projectcalico.org                        2023-07-19T18:03:50Z
kubecontrollersconfigurations.crd.projectcalico.org         2023-07-19T18:03:51Z
networkpolicies.crd.projectcalico.org                       2023-07-19T18:03:51Z
networksets.crd.projectcalico.org                           2023-07-19T18:03:51Z
Looking good! Wait for a while to complete the boostrap!
Complete
Once the boostrap is complete, it is time to monitor the installation...
It took about 40 min in my environment.
Congratulations on the successful completion! Our cluster, integrated with Calico as the Container Network Interface (CNI), is now up and running.
# openshift-install --dir ocp-calico agent wait-for install-complete
INFO Bootstrap Kube API Initialized
INFO Bootstrap configMap status is complete
INFO cluster bootstrap is complete
INFO Cluster is installed
INFO Install complete!
INFO To access the cluster as the system:admin user when using 'oc', run
INFO export KUBECONFIG=/home/mabe/Projects/HomeLab/WIP/baremetalsetup/installer/wip-blog/ocp-calico/auth/kubeconfig
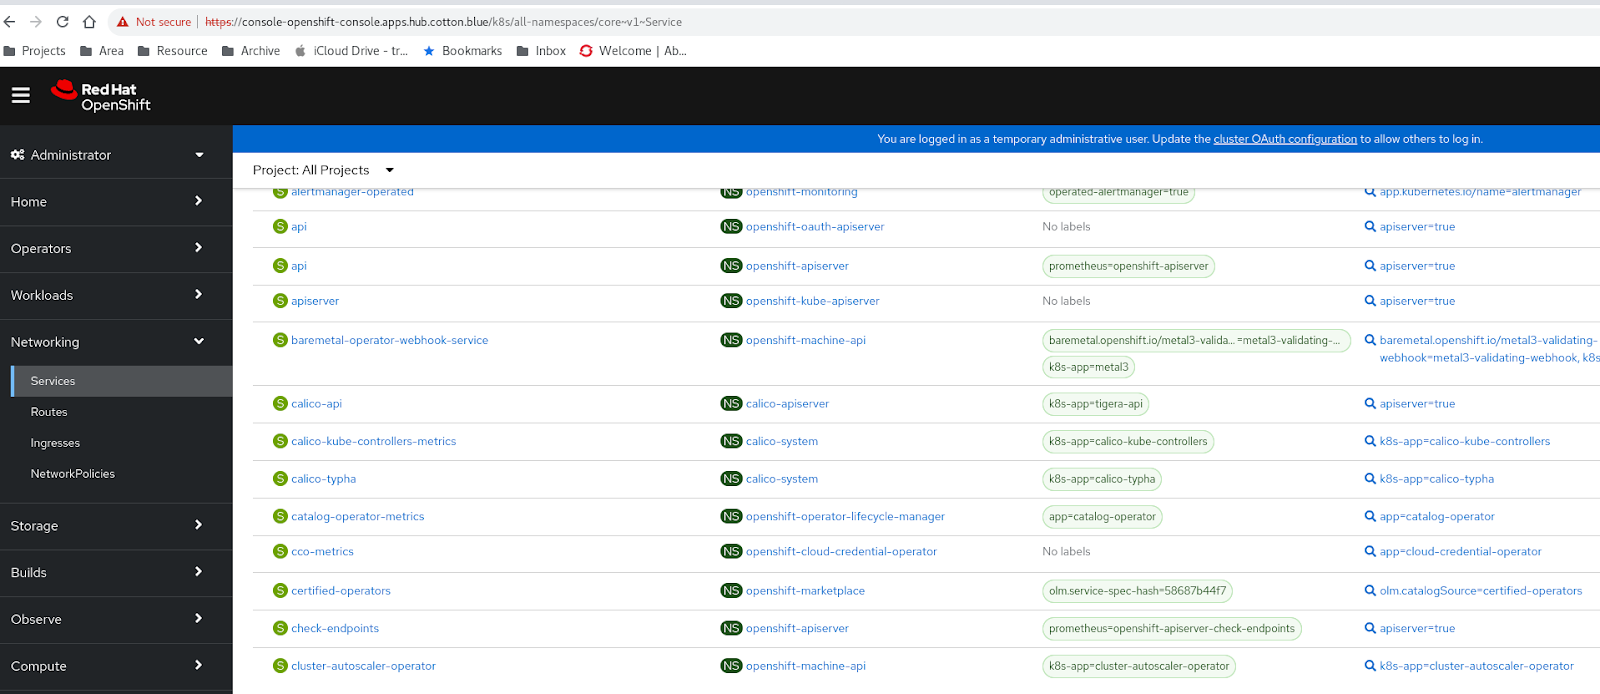
INFO Access the OpenShift web-console here: https://console-openshift-console.apps.hub.cotton.blue
INFO Login to the console with user: "kubeadmin", and password: "iyZF2-YmIJk-gg7PT-F8Bu4"
It looks like cluster's components are doing well, as indicated by the tigerastatus resource.
# oc get tigerastatus
NAME        AVAILABLE   PROGRESSING   DEGRADED   SINCE
apiserver   True        False         False      85m
calico      True        False         False      79m
Conclusion
I found the Agent-Based Installer to be a very powerful tool, particularly in its ability to create templates that make replication a breeze. Combined with oc-mirror, it significantly improves the efficiency of on-premise work (my lab). For this deployment, I decided to go with Calico as the Container Network Interface (CNI) solution for demo purposes. However, I encountered a challenge with the file size limit while integrating it. To work around this, I passed the OC command directly to the API during the bootstrap process, allowing me to proceed.
Throughout this experiment, I drew insights from various sources, which I have listed in the references section. Additionally, I have included a VM creation ansible playbook in my Git repository, making it available for anyone seeking references or interested in detail.
If you have any questions or need further assistance, please don't hesitate to reach out.
Thank you for reading and Happy OpenShfit!
References
- Github OpenshiftInstaller
- Installing an on-premise cluster with the Agent-based Installer
- Calico Installation: Openshift(Assisted-Instalelr)
- Deploy a OpenShift on libvirt using RHACM ZTP capabilities
About Calico
Calico is a third-party solution developed to provide flexibility and simplify configuring Kubernetes network connectivity.